What does RFID with Zero Integration Really Mean?
You’ve probably heard us go on and on about RFID with “Zero Integration” and thought “What exactly does it mean?”. Well, let’s say you’re ready to dive into the complicated and expensive world of RFID. You’ve most likely gotten a few quotes and seen a few demos where some industrial hardware is held up while RFID tags are waved in front, making the unit blink. You’re then told that it will take a few months and a 100+k to build out a system where you can actually see the data portrayed by the aforementioned blinky lights. This is integration and it can be extremely costly in both time and money.
Locera is a turnkey SaaS that requires none of that time and money commitment, hence RFID with zero integration. It’s already built and ready to start displaying your data from day one. To illustrate, we going to walk through the process of setting up two Siemens RF600 Series RFID Readers in Locera. If you’d prefer to watch instead of read, click here for a video of this walk through.
RFID Reader Setup
The entire RF600 series is supported by Locera, and for this example we’re going to focus on the 650R and the 685R. The 685R has a read range up to eight meters, while the 650R supports a read range up to five meters. There’s also a major difference in the support for antennas. The 650R does not have an integrated antenna but can support up to four additional antennas, which increases the number of read points that you have. The 685R, on the other hand, can only support one additional antenna, but has an integrated antenna for a maximum of two read points. In short out of the box, you can start scanning tags with the 685R reader, but would need to buy at least one additional antenna to start scanning with the 650R.
The last key difference is IP rating, which relates to the industrial housing of these devices. The 650R is rated IP 30 and the 685R is rated IP 65. Specifically, if you look at the 650R, there is an Ethernet port that can take a standard Ethernet cable, whereas the 685R has an M12 connector for a more durable connection. These differences aside, setup of the readers is the same.
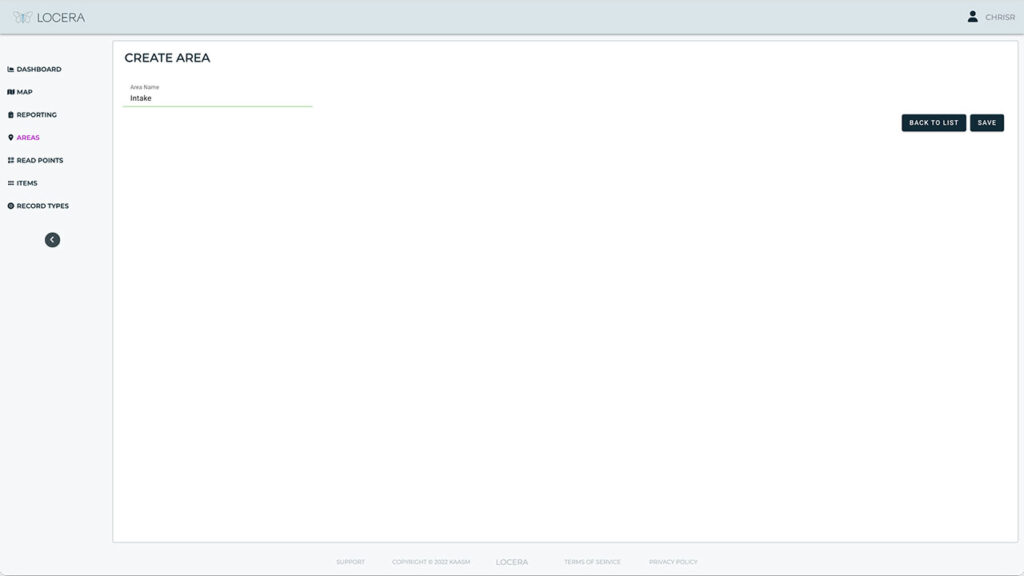
That’s enough about the readers for now, let’s get started. First thing we will need to do is create the areas where the readers will live. In this case we will create one for each reader name them Intake, and Work Cell #1. From the dashboard, navigate to the Areas page in the navigation tree to the left. This page is where you can see, create, and edit your areas. Click the plus button in the upper right and name the area. Hit save and that’s it for that.

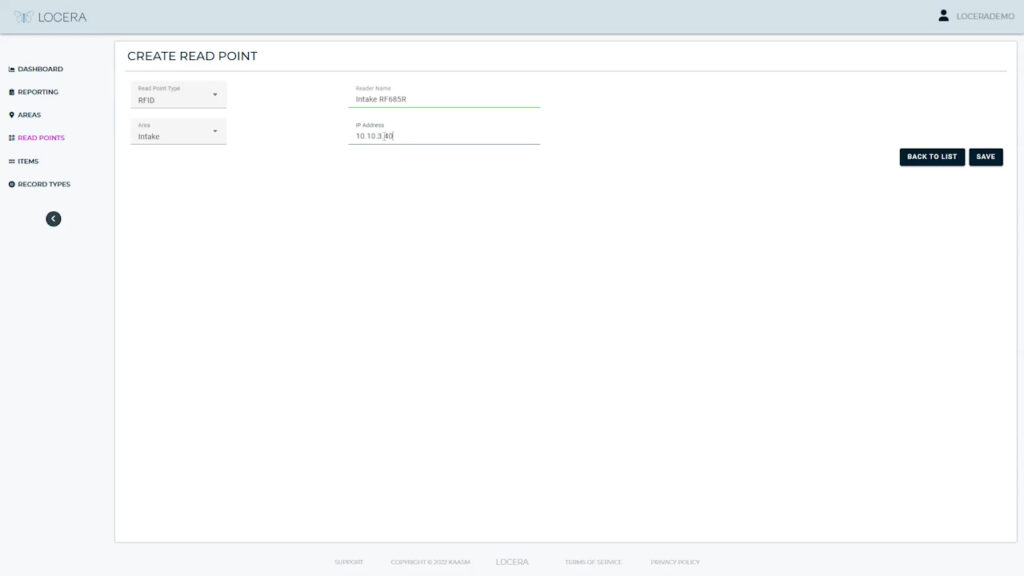
Next, click over to the Read Points page in the navigation tree. This page is where you can see, create, and edit your readers. It also provides some basic diagnostic information such as reader status, IP address, and firmware version. To add a reader, click the plus button in the upper right. Set the type, pick the area from the drop down, and give it a name. The reader name is user defined, so you can call it whatever you would like. For this example we are going to give it a name associated with the location.
Lastly, we’ll give it an IP address on the network and hit save. Please note that once the name of the reader is set, it cannot be changed.
To add the second read point, just repeat the process. Select the type, set the area, name it and give it an IP address. Click save and wait for Locera to add the reader. Now that the readers have been added, any scans of your RFID tags will display in Locera. Rinse repeat for additional readers.

So, to recap:
- Navigate to Areas page
a. Click the + button
b. Give it a name
c. Hit save - Navigate to the Read Point Page
a. Click the + button
b. Set the reader type (RFID)
c. Set the area
d. Name it
e. Give it an IP address
f. Hit save - Start Scanning and Seeing Your Location Data
As you can see, Locera makes it extremely easy to add readers, start scanning and begin seeing your data. If you have questions or want to learn more, which of course you do, schedule a demo and see how easy RFID with zero integration can be!
Don’t Like to Read?
Reading isn’t for everyone. If that’s you, here is a nice little video we made walking through the steps above.
[DISPLAY_ULTIMATE_SOCIAL_ICONS]
